Open Broker
v1.1.1
Hyperliquid trading CLI. Execute orders, manage positions, and run trading strategies on Hyperliquid DEX with full HIP-3 and HIP-4 outcome support.
Installation
Open Broker is split across three npm packages so you only install what you need:
openbroker— the trading CLI itself. Standalone, works without OpenClaw.openbroker-plugin— OpenClaw plugin packaging (manifest + agent tools + position watcher). Depends onopenbroker.openbroker-monitoring(optional) — dashboard / metrics forwarder. Auto-loaded at runtime when present. See Monitoring.
Pick the path that matches how you'll use it. The Plugin docs cover all three install paths in detail.
OpenClaw plugin (recommended for agents)
openclaw plugins install openbroker-plugin
openclaw gateway restart
openbroker setup
This installs the plugin manifest + agent tools and pulls the openbroker CLI in as a transitive dependency.
CLI only
npm install -g openbroker
openbroker setup
Use this if you want the trading CLI without the OpenClaw plugin packaging — for servers running automations standalone, or for local CLI use.
OpenClaw Skill (ClawHub)
Open Broker is also available as an OpenClaw skill on ClawHub. Reference the skill from any OpenClaw agent without an explicit install.
Quick Start
1
Setup
Generates wallet, creates config, and approves builder fee — all in one command.
openbroker setup2
Fund your wallet
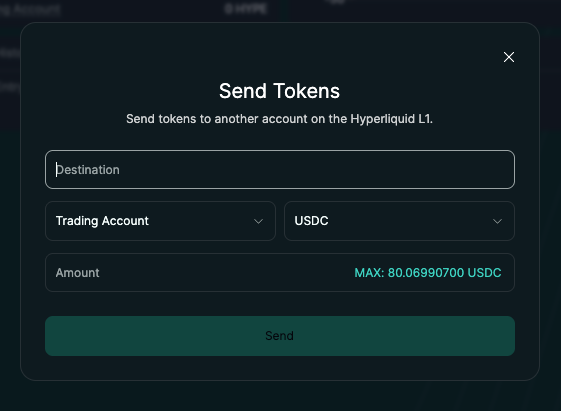
Send USDC on Hyperliquid L1 to your agent's wallet using the Send feature on
app.hyperliquid.xyz
3
Start trading
openbroker account                          # View account info
openbroker buy --coin HYPE --size 0.1        # Market buy
openbroker search --query GOLD              # Find markets
Setup
Interactive one-command setup that handles wallet creation, config, and builder fee approval.
openbroker setupThe setup wizard offers three modes:
- Generate fresh wallet (recommended for agents) — creates a dedicated trading wallet with the builder fee auto-approved. No browser steps needed — just fund with USDC and start trading.
- Import existing key — use a private key you already have (master wallet). Builder fee is approved automatically.
- Generate API wallet — creates a restricted wallet that can trade but cannot withdraw. Requires browser approval from your master wallet.
Config is saved to ~/.openbroker/.env (permissions 0600).
Fresh Wallet Setup (Recommended for Agents)
The simplest setup for agents. A fresh wallet is generated, the builder fee is auto-approved, and the agent is ready to trade immediately after funding.
- Run
openbroker setupand choose "Generate a fresh wallet" - The CLI generates a wallet, saves the config, and approves the builder fee automatically
- Fund the wallet by sending USDC from your Hyperliquid account to the agent's wallet address using the Send feature on app.hyperliquid.xyz. Note: funding should be done on Hyperliquid L1 only.
- Start trading
API Wallet Setup (Alternative)
API wallets can place trades on behalf of a master account but cannot withdraw funds. Use this if you prefer to keep funds in your existing wallet and only delegate trading access.
- Run
openbroker setupand choose "Generate API wallet" - The CLI generates a keypair and prints an approval URL (e.g.
https://openbroker.dev/approve?agent=0xABC...) - Open the URL in a browser and connect the master wallet (MetaMask, etc.)
- The master wallet signs two transactions:
ApproveAgent(authorizes the API wallet) andApproveBuilderFee(approves the 1 bps fee) - The CLI detects the approval automatically and saves the config
After setup, the config will contain:
HYPERLIQUID_PRIVATE_KEY=0x...        # API wallet private key
HYPERLIQUID_ACCOUNT_ADDRESS=0x...    # Master account address
HYPERLIQUID_NETWORK=mainnet
For agents: pass the approval URL to the agent owner (the human who controls the master wallet). The owner must approve in a browser before the agent can trade. The CLI waits up to 10 minutes for the approval — if it times out, re-run openbroker setup.